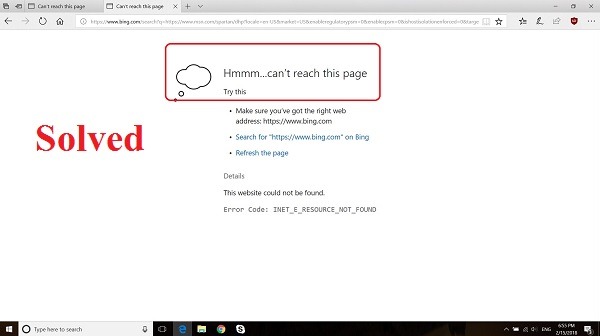
most of us have updated our OS to Windows 10 and enjoying all its features. All these features without an Internet connection would merely look like an ordinary OS. What if we have Internet Connection and still unable to connect to the Internet. Now that’s the problem. You will be enjoying your browsing for a minute and on next minute you will see a message “The Site Can’t be Reached” or “No Network Connection”. We would have complained to ISP lot of time and there would be no problem with Network Connection. Still, we will have this issue. Before proceeding make sure that you have paid your bills regularly to the ISP. How to fix “Not connecting to the Internet”
How to fix “Not connecting to the Internet” in Windows 10 Pc:-
By following these steps you will be back to your browsing in no time:
Troubleshooter:-
Windows has this amazing feature “Troubleshoot” which scans for the problem and fix it automatically. To enable this you need to open “Windows Settings” and in windows settings, select “Update & Security” and then give troubleshoot.
You will be asked to select from a list of option in which area you need to troubleshoot. In that, you need to select Internet Connections
How to fix “Not connecting to the Internet”
Turn off the firewall:-
Online security is must to secure our personal details and other data. But the windows firewall is highly configured for this purpose. Our connection to the Internet will be good for a certain time and suddenly it will drop or show no connection. This happens because Windows firewall blocks the incoming and outgoing traffic. It is simple to turn off the firewall. You can access the firewall either by searching in the windows start menu or through the control panel. For control panel:
- Open the Control Panel through the start menu.
- Once the Control Panel opens select System and Security > Windows Defender Panel.
- In the left panel, you will see the option Turn Windows Firewall On or Off
- Once you click it a Customize Setting Tab will appear
- In that, you need to click Turn off Window Defender Firewall
This should fix your network issue, If not then again turn on the Windows firewall
IP address:-
Our network runs on the specific IP address, sometimes it backs up the network connection. For those cases, It is better to change the IP address.
Open the command prompt by searching in the Start Menu bar
Then you have to execute the following command
ipconfig /release
Now your IP address will be set to a value 0.0.0.0. This won’t cause any trouble. It’s just that you have told the windows to clear your IP address.
After executing the above command
You have to execute a new command
ipconfig /renew
Now you will get a New IP address and your Network issues should be solved if not then restart your system and check again.
LAN settings:-
If you are using an Internet connection from the institution or some public areas then this will do the trick.
Search for Internet Connection in the start menu
In that dialog box, you need to click on the Connections tab
There you will see an option “LAN settings”
In LAN settings you need to uncheck the option “Automatically detect the settings”. And check the option “Use a proxy server for your LAN”.
In addition, you can also check for the Advanced tab in Internet option
And remove the tick on “Enable Enhance Protection Mode”
This setting ensures protection to the internet but also hinders its function.
How to fix “Not connecting to the Internet”
TCP/ IP setting:-
This problem may persist if a static IP address is assigned to you. If IP address is assigned by DHCP (Dynamic Host Configuration Protocol) then you won’t have this issue. DHCP assigns an IP address from a list of the available IP address so that you don’t need to worry about Internet traffic. To check this follow these steps:
Control Panel> Network and Internet > Network Connections
There you need to right-click the Internet Connection you are using and then select Properties
In Properties, you will find Internet Protocol Version (TCP/IPv4). Then click the properties after selecting the option
A dialogue box will appear, in that make sure that Obtain IP address automatically and Obtain DNS server automatically is checked.
How to fix “Not connecting to the Internet”
Disabling and Enabling the Network Connection:
This seems to be simple but will help in solving our issue in a faster way. If our computer doesn’t have a specific IP address then we can do this step to get a new IP address.
Control Panel> Network and Internet > Network Connections
As mentioned above right click on the network connection and select disable.
And now again enable it. This should solve the issue
If the above methods are not fixing the issues then the problem must be with your router. If you have any feedback or ideas to for this topic please mention below so that we could know.
